Wat is er nieuw in STRAKON 2026
Binnenkort zal STRAKON 2026 beschikbaar zijn.
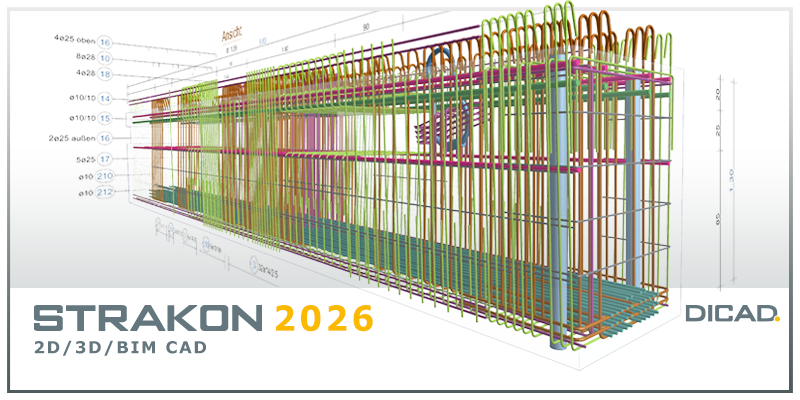
Nieuwe functies, wijzigingen en verbeteringen ten opzichte van de huidige release (nieuwigheden).
Belangrijke info over versie 2026
Database sprong naar versie 2026
De STRAKON 2026-versie bevat een databasesprong voor verschillende belangrijke STRAKON-gegevens (tekeningen, Flex-Parts/3D Embedded Parts, enz.). Dit betekent dat deze gegevens worden opgeslagen nadat ze zijn ingelezen of bewerkt in STRAKON 2026 en niet langer compatibel zijn met STRAKON <2026. Als u aan projecten werkt met meerdere gebruikers, overweeg dan of u het project in de vorige versie van STRAKON wilt afronden of alle STRAKON-gebruikers direct wilt updaten naar STRAKON 2026. Dit geldt dan ook voor de gegevensuitwisseling met externe STRAKON-leveranciers.
-
Als u aan een zelfvoorzienend project (projectmodel) werkt, wordt de tekening ook gemarkeerd met [AUTARK] in de titelbalk van de 2D
Bij het instellen van een tekening voor de HPGL-viewer kunt u nu bepalen dat elk HPGL-bestand in een eigen map wordt geplaatst. Voer een ordernummer in de tekeninggegevens in. De mapnaam Viewer wordt hierdoor uitgebreid.
-
Master Data
In de Master Data kunt u nu duidelijk zien in het projectmodel, aan de hand van de naam Autark en een omgekeerde weergave, dat de administraties voor gegevensbeheer/labeling templates, netten, materialen en part types, en drawing schedule templates hun eigen gegevens lezen uit de map standard-db.
Administrations
Als u projectspecifieke administrations zoals material- of part type-managment opent in een op zichzelf staand project, wordt het pad ook gemarkeerd met de opmerking [AUTARK] in de titelbalk.
-
Algemeen
De selectie van opties via een toggle icoon in de additional toolbar is herzien. Nadat u op de extra pijl naast het toggle icoon hebt geklikt, worden alle opties onmiddellijk weergegeven in een keuzelijst.
Dialoogvensters met opties voor meer duidelijkheid.
Sommige dialoogvensters in het programma met opties voor instellingen, zoals het weergavevenster of prefab-delen voor vloerplaten en wanden, zijn uitgebreid met de boomstructuur in het linkerdeelvenster. Hierdoor kunt u via de categorieën sneller naar de instellingen navigeren.
Toegankelijkheid
Toetsopdrachten gewijzigd
Gebruik nu de [G]-knop om de grip points in of uit te schakelen.
Deze toetsopdracht wordt vervolgens weggelaten voor de functie Area along the entry.
Cube - functies
If an IFC file is imported from the File function and objects with GUIDs already in the model are detected, those objects are ignored and only new objects (with GUIDs not yet present) are offered for import.
If you assemble a Flex-Part along the path, you can now place it relative to the center of each path segment. You can also choose from different installation heights in relation to the path segment.
For the import IFC, the limit for auto-smoothing has been reduced so that standard components, such as stairs, are not affected by smoothing. In addition, you can use the object data to determine a limit for the angle to which edges may be smoothed.
You can now rotate an object/component in any increments as you placement, copy, or move the selected object. You can determine an angle and the rotation direction for rotation.
Reinforcing elements against punching are available as parameterized 3D embedded parts in the Dowel Bar catalog from Schöck Bauteile.
You can create a surface mount part for a polygonal surface using the new Surface Embedded Part function (tab Components > group Convert). An export to drawing as 3D view as well as in production files is possible.
The Verwaltung of the 3D embedded parts has been expanded to include the surface type to automatically associate the surface mounting part during creation. You can machine the data of the surface mount part.
In the Shuttering boards function, when the shuttering boards are create to the component surfaces, the settings for the thickness of the shuttering boards and the joint are saved beyond the end of the program. The settings of the export to drawing as 3D view are also saved during additional toolbar.
-
For example, if you move the edit box over the reference point in a building by one story, the section in the drawing remains in its original location.
-
You can now optionally create a project backup of the old work directory before you save the old work directory to the current version, so that you can reopen the project with an older version if necessary.
The export of a project has been expanded by an additional dialog with information on the ZIP file. In addition, upon request of the DICAD hotline, a direct upload of the ZIP file to the DICAD server is possible.
In the Project Structure, the icons in the icon bar have been adjusted to more clearly reflect their use. In addition, the icon bar has been expanded to include the New group and New section icons to create individual layers.
In the data or when editing a layer, the dialog has been expanded to include the information of the layer type and the value for the IFC attribute "CompositionType", which is assigned to the layer. When creating a new layer, you can enter a Detailed name (IFC attribute "LongName") in addition to informal purposes.
You can now change the type data for a Flex-Part or 3D embedded part while editing in the Cube component or Project model - Shop drawing.
In a general arrangement, you can now quickly create a new shop drawing or open an existing shop drawing via the context menu.
-
Algemeen
You can create a new Cube view directly from a section.
In the export of a Cube view as a 3D view into the drawing, the position of the automated reference point was improved. This is now located at the lower left corner of the BoundingBox of the model objects.
Objecten
In a Cube view, you can now also create the reinforcement label for existing meshes (see function View Box (Cube View / Cube): plan representation meshes laying / bending shape) and selected bending shapes (function Bending Shape). The Settings (laying: Matten and bending shape: Matten) kallow you to determine the global display of the reinforcement label in the project in the dialog.
Before entering a reinforcement label for Rebar and Meshes, you can use the new Voreinstellungen Objektdaten option fo determine object data for the Position symbol, Item number, Text and Dimension text (for meshes) in the settings. Subsequent modify of labeled transfers is then possible via the object data.
To ensure that all reinforcements in the component are labeled, you can use the new Beschriftung automatisch starten function in the additional toolbar of the respective Laying or Bending Shape function to have all transfers or all bending shapes automatically scanned one after the other and then labeled.
Using the new function Automatic (tab Objects > group Reinforcement label), you can have all routing and bending shapes automatically scanned one after the other and then labeled.
In the Cube views, you can now also select the Arial Narrow font for texts, such as in the dimension or the reinforcement label.
View
You can switch the display of the mesh label including the diagonals on or off via the new option Mattenbeschriftung for a plan-oriented display in the Cube.
-
When the project summary shop drawing opens, you can now select only the submodels you want to load to avoid a long wait time while loading. Not all submodels in the project will be loaded in the background.
-
Algemeen
To clarify which object the reinforcement is connected to, the beginning of the bending shape is displayed by a virtual blue point when the reinforcement is entered. This is especially useful when two items, such as HFT slab / wall corners, are directly superimposed with their vertices.
Input Rebar
You can start or end a suspension reinforcement with a draft bar crank at any point of reinforcement on the edge of the object.
You can now determine the distribution of the laying via the as value / As value
Edit Rebar
To speed up the overlap length modify process, you can specify a value as the Default overlap length directly in the additional toolbar. This value is saved and applied for further input.
Special Meshes / Cube PXML Meshes
You can now automatically assign the reinforcement type for Cube special meshes and Cube PXML meshes during PXML export by turning on the Reinforcement type of individual bars option.
Other
-
Algemeen
In order to standardize the dialogs, the button for switching the master data path via the selection list has been removed from the mesh administration. The data path to the mat file is displayed in the title bar.
-
The library of 3D embedded parts has been expanded to include the profile embedded parts Schoeck Bole F, Schoeck Bole O and Schoeck Bole U.
-
Semi Precast Part Slab
When creating a slab, you can use the Erforderliche Bewehrung in Längsrichtung pro Element abfragen function to query the required reinforcement in the longitudinal direction for each entity individually.
Removed bend shape type „----“. For a bar without a crank, it now only enters the BF00 bending mold type. The reinforcement projection can be positive, negative or 0. When old drawings with the bending mold type „----“ are read in, this is replaced by BF00. The reinforcement projection is always 0.
Semi Precast Part Wall
You can also determine the wall for the negative objects and wall openings to define them as drill zones, to pass through lattice girders and reinforcement, and to settle on export. To do this, open the cutout.spt data container template to expand the data container